Use PFSense? Want to tunnel some traffic through a VPN? Want to make use of your fancy VLANs? Realize not everything needs to be put in a docker container?
My NordVPN client on my NAS would crash causing the Linux ISO downloading client to shutdown. My first thought as always lately is “how can I get this working with my Docker lab?”. Well after spinning the Nord VPN container up and getting it to run and realizing the amount of hassle I will be putting myself through – I really should be keeping my networking within the networking side. So off to figure out how to set that up on my pfSense firewall.
Since this is my first post, I would like to warn you – networking and me are hesitant friends. It’s never been my strong suite but I’m working to rectify that. Getting a pfSense beefy router running within Proxmox with 5 VLANs and plenty of granular rules was a start. Setting up Snort and being terrified of having any service open after watching the logs…was another.
I’m learning.
Back to the VPN install. I started this all at 6am on a whim, because that’s what I do on a Saturday morning. I wanted to get this done as soon as possible before the reboots would lead to complaints. Reasons for doing this
- You want your traffic going through a VPN tunnel but don’t want to install and maintain a client installed
- You want your networking solution(s) self contained in a appliance
- You just want to try this out to learn
Prerequisites
pfSense running (latest version as of this writing is 2.5) and configured correctly
Understanding of your IP scheme / have IPs of the PCs you want filtered through the VPN
Valid VPN credentials from a provider (I’m using Nord, but PIA, Express or almost any other will do as long as they allow OpenVPN connections). I’m not selling or pushing any provider here.
Okay, so now onto what we’ll be accomplishing to get this going.
We’ll be using the pfSense OpenVPN packge. I believe its preinstalled. What this does is gets it setup as a client. With it connected you can then funnel whatever traffic you want through that gateway. After we get that connected we will be taking that connection and assigning it an interface. This will allow us to do things to it, such as assigning it as a gateway. We will then then setup the NAT rules to allow the LAN(s) out the VPN. Lastly will be the firewall rules to get the traffic going where we want.
1.
https://support.nordvpn.com/Connectivity/Router/1626958942/pfSense-2-5-Setup-with-NordVPN.htm
To setup the VPN there should be documentation. Above is the most recent for NordVPN. Follow the steps correctly! That’s it you’re done. Post done, bye.
I’m kidding. Here you’ll follow up to Step 6 as we are not setting up Nord as out DNS resolver. You can if you like, but I am not.
After its complete and connected you can verify by going to VPN > OpenVPN > Clients to view the connection. To view the status of the connection, go to Status > OpenVPN


2.
Setup interface.
Here we will be assigning the interface to the connection you just created. Go to Interfaces > Interface Assignments and find OPTx (x being the number) click on the drop down and select your connection. Mine for example:

Click on the left name and rename it to whatever you like and enable the interface.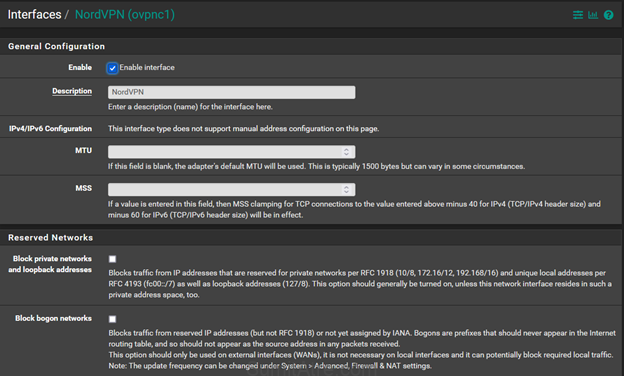
Click save.
3.
Now we assign this interface to a Gateway we’ll create.
To do this go to System > Routing > Gateways and click on the +Add button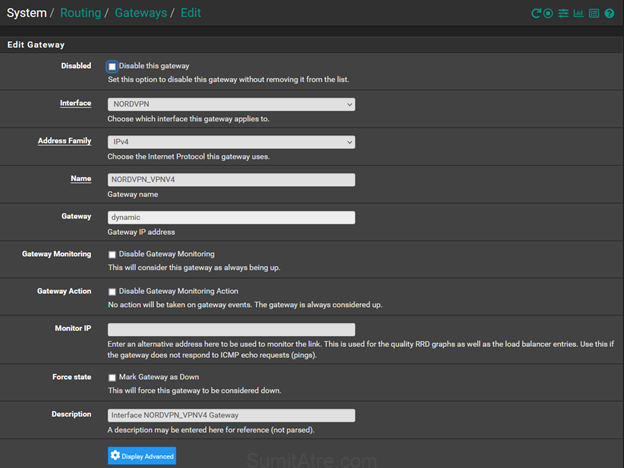
Chose the interface you just created in step 2. Pick the address family (I’m sticking with IPv4), give the gateway a name and the IP information is usually dynamic. Write a description, by the way always write a description. I left the monitor IP blank so it just self checks.
Click save.
After creating a gateway it’s a good idea to reset states and reboot. I just find it helps.
To do this go to Diagnostics > States > Reset States. Check the ‘reset states’ box and click the button. It will hang for a bit but should come back up within a minute.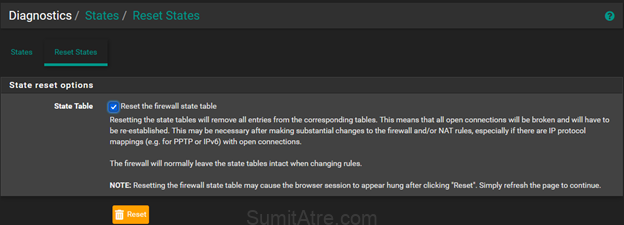
4.
NAT rules 🙂
Setting the NAT allows traffic to go out of the gateway. To accomplish this we need to go to Firewall > NAT > Outbound.
You can use Hybrid or Manual but we need to be able to create rules manually. I like Hybrid.
Scroll down and click on Add. Select the interface for the VPN you created earlier. Select the address family, again I chose IPv4. Here is the “fun” part. Select a network as your source. I put in the VLAN for my network that I want to control. I’ll have more granular permissions when I setup the firewall rule.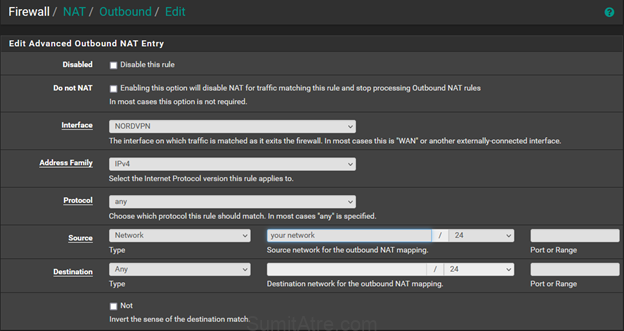
Keep the rest the default and put in your description.
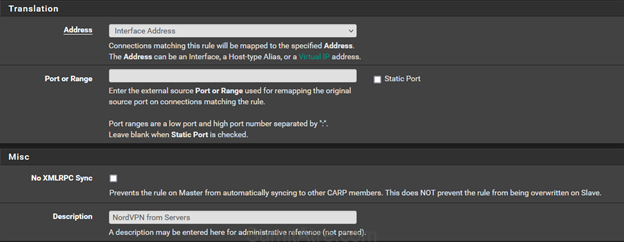
Click save.
5.
Now to get the traffic to flow through correctly. While this may seem like a simple firewall rule, so yea it is – just has a gateway attached. Its not that fancy. Anyways in my case I just wanted to have one host protected for now (I can modify this, add more etc later). So create a firewall rule make sure the Interface is the one of your network that you are trying to protect (in my case my NAS, servers VLAN). I have my networks in groups so in my case its Trusted.
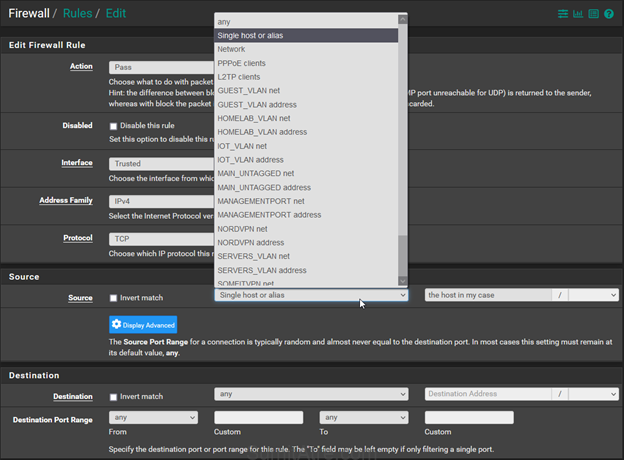
Click on Advanced in the Extra Options section and a whole bunch of options will pop up, ignore most but scroll down until you see Gateway.
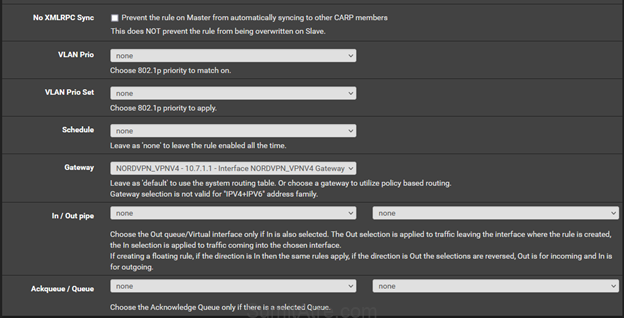
Select your gateway that you created earlier.
Click save.

Make sure you let everyone know that you’re messing with their Youtube time. Or whatever the Kids/Adults are into these days. Farmville a thing still? Regardless just give them a warning it’s the nice thing to do.
Reboot.
Bonus.
Click on the pfSense logo and go back to the home landing page. Click on the + and click on traffic graphs.

You’ll be greeted with pretty graphs. If all is going well you should see traffic flowing through the VPN interface. Go to your hosts that you just protected and check their IP. I recommend https://myip.wtf. If the IP is the not your ISPs then congratulations you’ve now got a VPN gateway running that you can just funnel PCs through, not worry about clients crashing or installing and updating. You can protect whole networks (IoT devices). Its great and to be honest this post took longer to write.
I did this for you! (also for myself because documenting is cool).
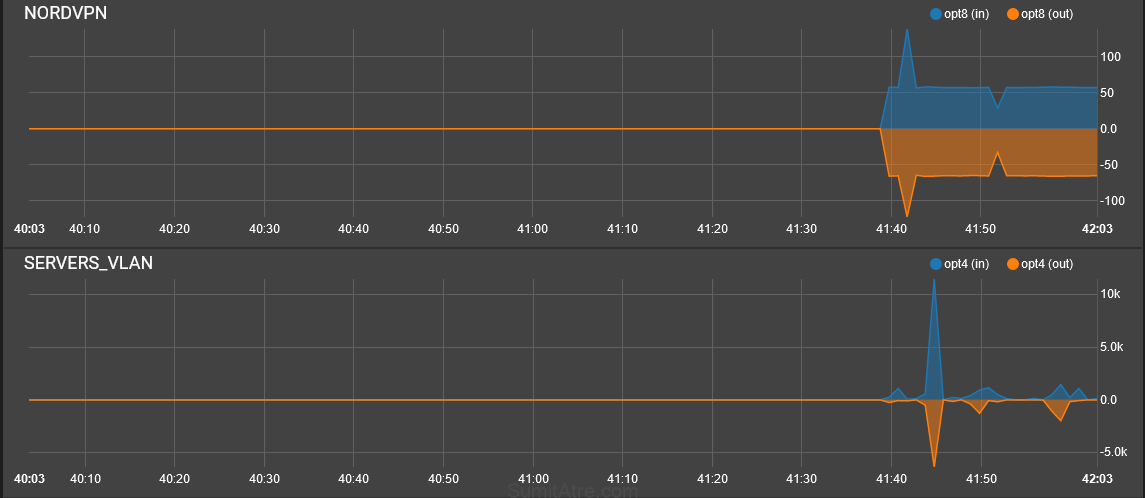
That’s it! If you’ve ran into any issues check your Firewall rules section, check if the VPN is actually connected by looking at the logs. Run a few tests and lastly rebooting helps. Especially in this case.
Good luck and happy Nerding!
-Sumit


Be First to Comment